
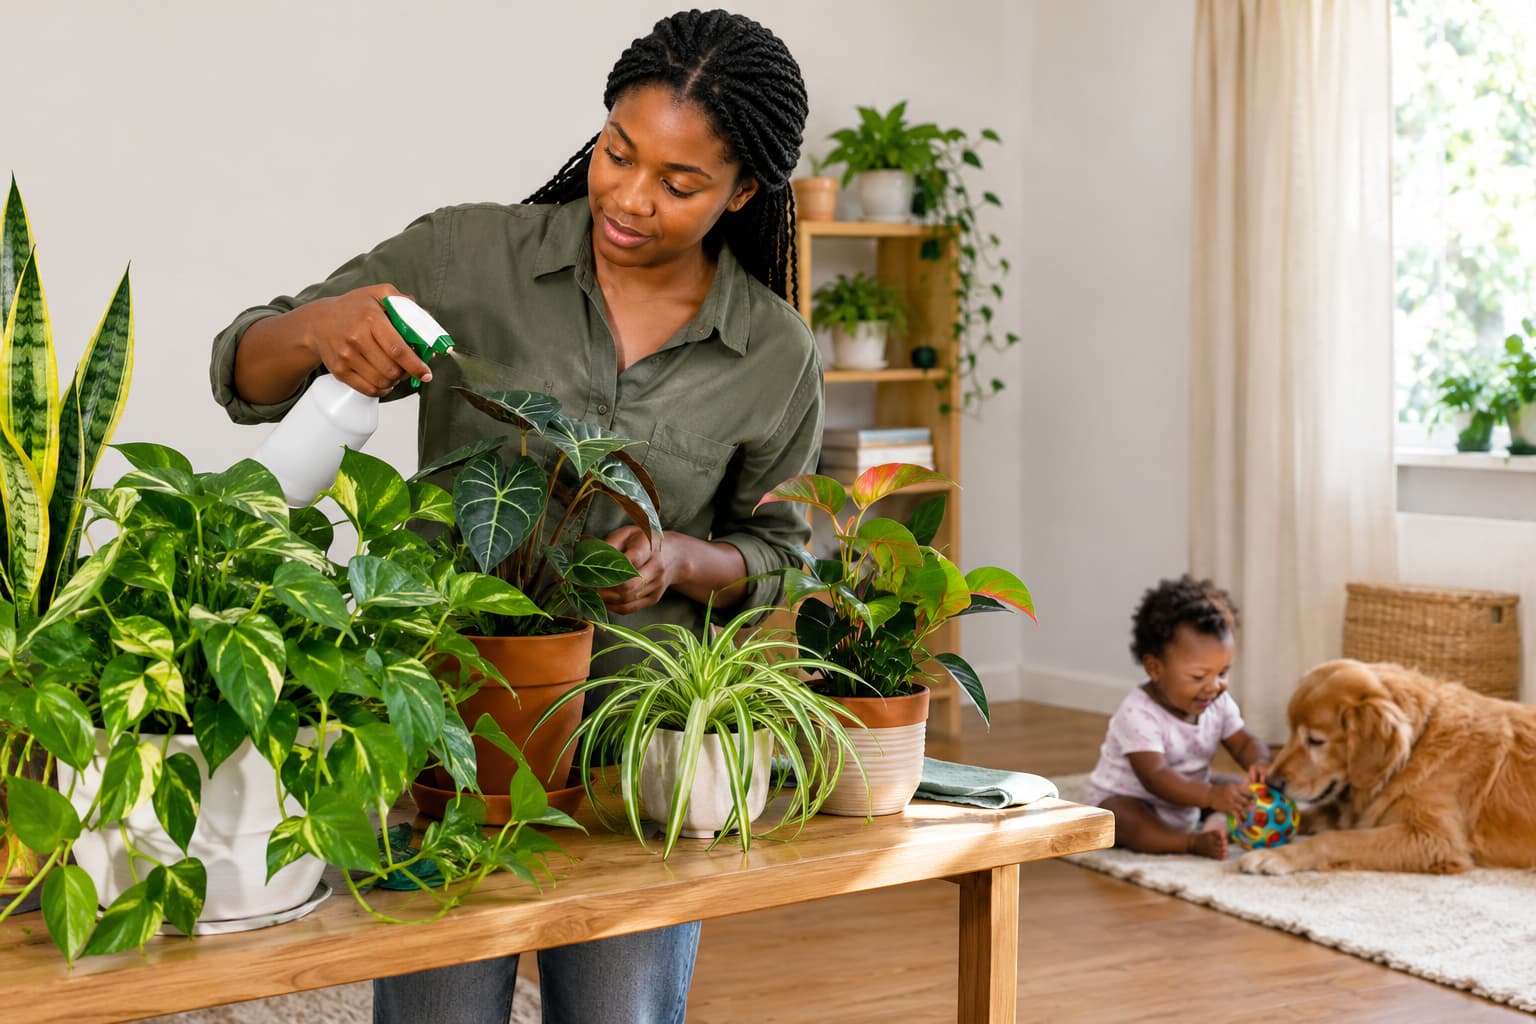
Spider mites are among the most frustrating pests a houseplant owner can encounter. These tiny pests can reproduce quickly under favorable conditions and cause significant leaf damage before you realize there is a problem. If you are wondering how to get rid of spider mites on indoor plants, the first step is to identify the infestation early and understand the conditions that allow spider mites to thrive. With proper detection, isolation, plant care, and treatment, you can control an infestation and help your indoor plants recover.
The good news is that discovering spider mites does not automatically mean you have to throw away your plant. Early detection, thorough washing, appropriate treatment, and consistent follow-up can greatly reduce an infestation and give the plant an opportunity to recover.
If you have noticed tiny pale spots on your leaves, fine webbing, yellowing foliage, or small moving specks underneath the leaves, spider mites may be responsible.
This guide explains how to get rid of spider mites on indoor plants, how to identify them correctly, which treatments are useful, what mistakes to avoid, and how to prevent them from returning.
For a strong foundation in indoor gardening, explore our Complete Guide to Indoor Plant Care for Beginners, covering simple tips on watering, light, soil, feeding, and everyday plant care.
What Are Spider Mites?
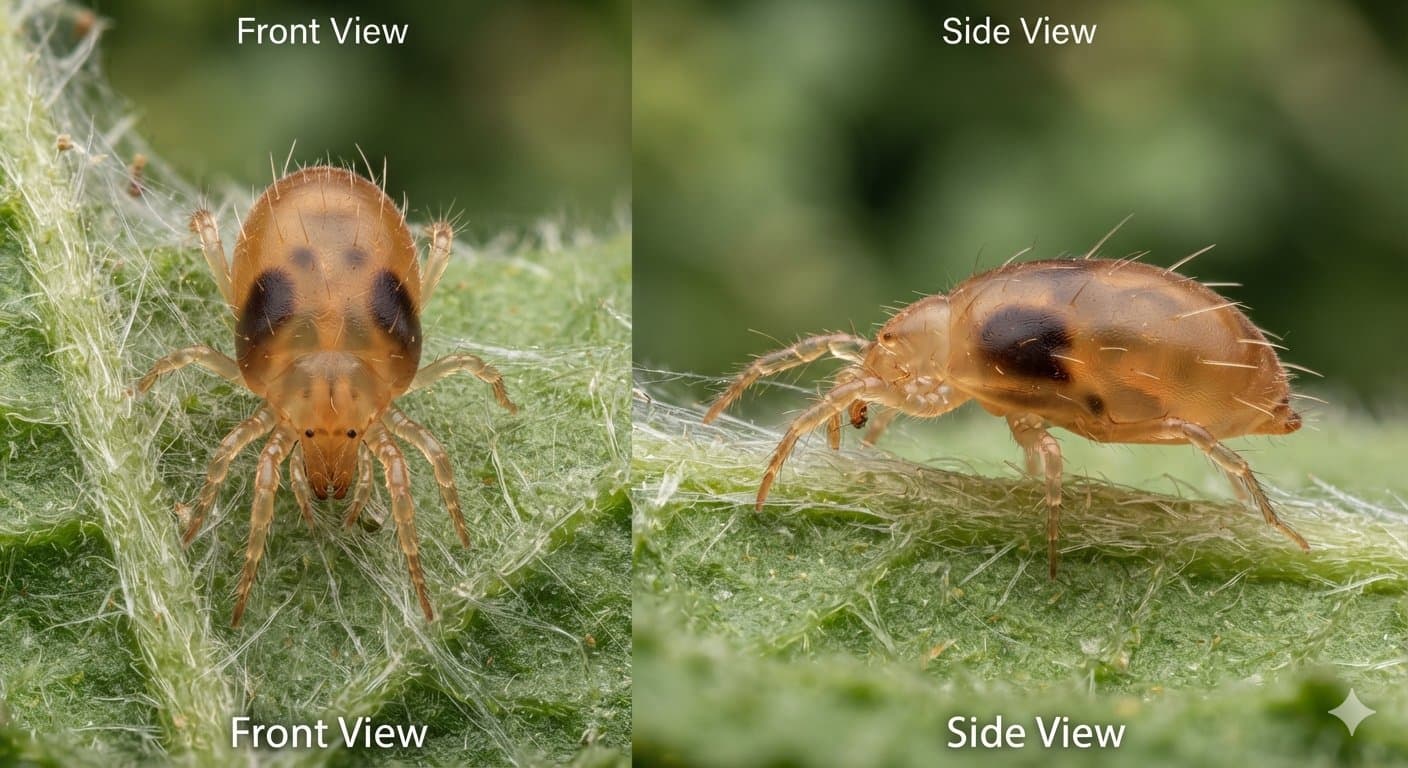
Spider mites are tiny plant-feeding arachnids rather than insects. One common species found on plants is the two-spotted spider mite, which feeds by piercing plant cells and sucking out their contents.
Because spider mites are so small, you may not notice the actual pests at first. Instead, the earliest warning signs are often changes in the leaves.
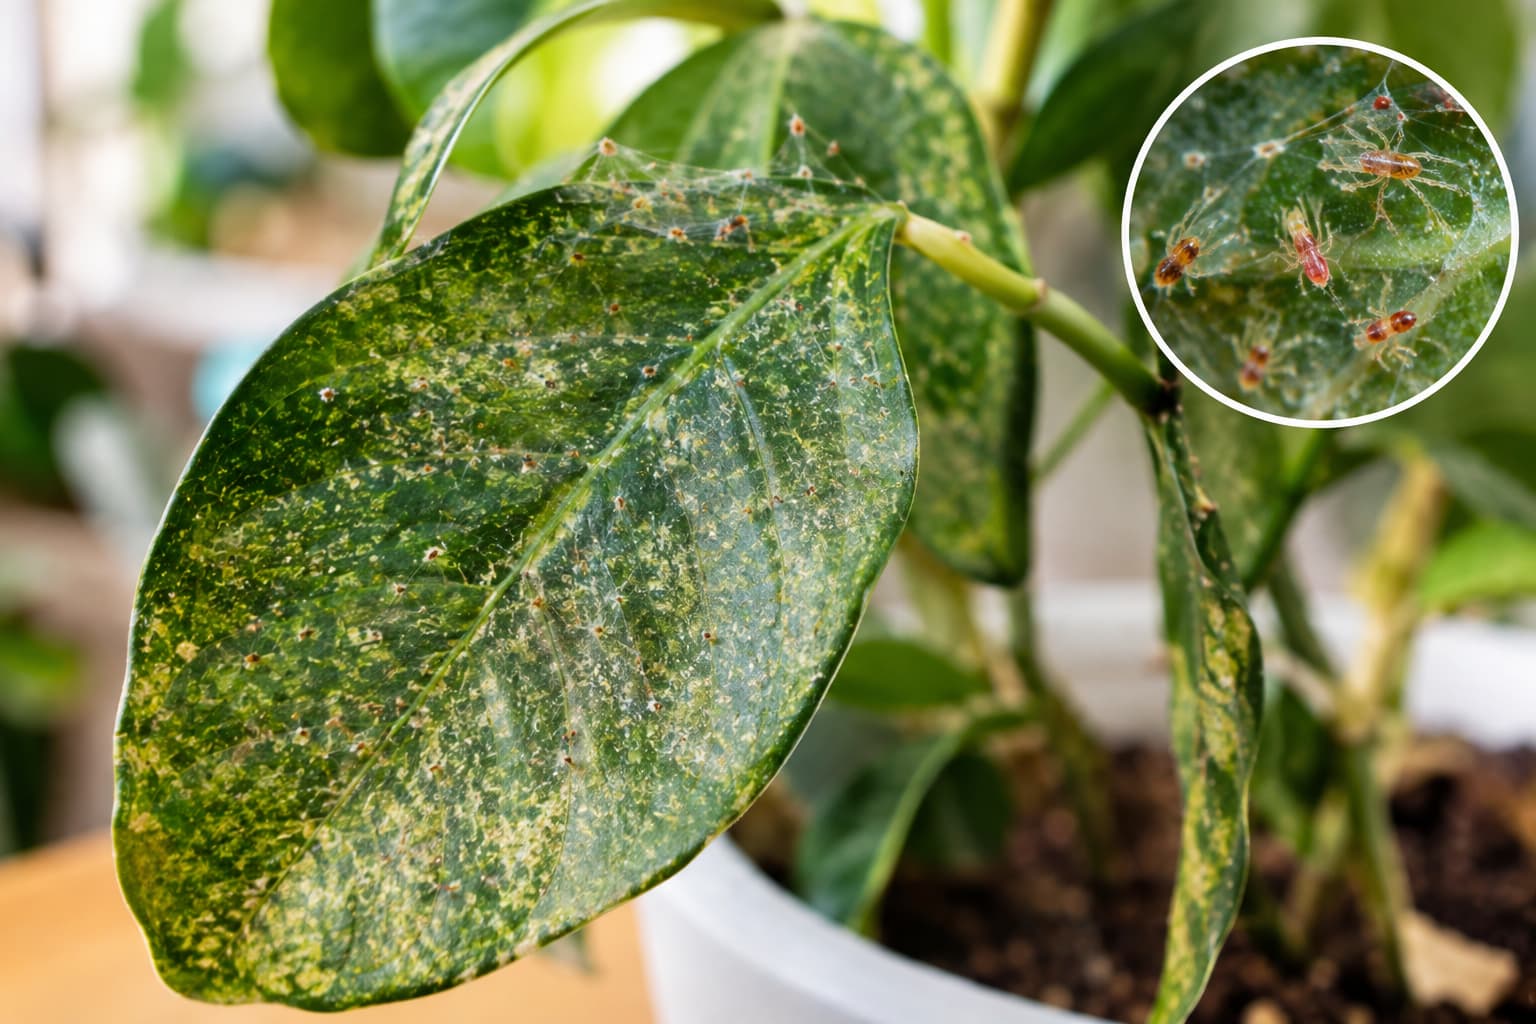
According to university extension guidance, spider mite feeding can create small yellow or pale spots known as stippling. As an infestation becomes more serious, leaves can become yellow, bronzed, bleached, dry, or eventually fall from the plant. Fine webbing may become visible when populations are high.
Spider mites can affect many types of indoor plants, including palms, ivy, dracaena, schefflera, and other common houseplants.
They are particularly troublesome in warm, dry conditions, where their populations can increase rapidly.
How to Tell If Your Indoor Plant Has Spider Mites
Before treating a plant, make sure spider mites are actually the problem. Yellow leaves alone do not prove that mites are present because yellowing can also result from watering problems, nutrient deficiencies, root problems, inadequate light, or other stresses.
Look for several signs together.
1. Tiny Pale Spots on the Leaves
Spider mite feeding damages individual plant cells.
This often produces a fine pattern of pale yellow, white, or yellow-green dots across the leaf surface. This is called stippling.
In an early infestation, the damage may look like somebody has sprinkled tiny pale dots across the leaves.
As feeding increases, the affected areas can become more noticeable and the foliage may lose its normal healthy color.
2. Fine Webbing
Spider mites can produce delicate silk webbing around leaves, stems, buds, and growing points.
Do not assume that every web on a houseplant means spider mites. Ordinary spiders can also build webs.
Spider mite webbing tends to hug the plant closely, particularly around foliage and stems. Heavy infestations are more likely to produce obvious webbing.
3. Tiny Moving Specks
Adult spider mites are extremely small and may be difficult to see without magnification.
A useful detection method is to place a sheet of white paper beneath a suspicious leaf or stem and gently tap the plant.
If mites are present, tiny moving specks may fall onto the paper.
A hand lens can make identification much easier. University extension sources commonly recommend magnification when checking plants for mites.
4. Yellow, Bronze, or Dry Leaves
A progressing infestation can cause leaves to become increasingly discolored.
Severe feeding may cause foliage to appear yellow, bronzed, bleached, brown, or dry. Leaves may eventually drop from the plant.
5. Declining Plant Vigor
A heavily infested plant may stop producing healthy new growth or generally look weak.
The problem is not simply cosmetic. Spider mites feed directly on plant tissue, and severe infestations can stunt growth and, in some cases, kill a plant.
How to Get Rid of Spider Mites on Indoor Plants
The most effective approach is usually not a single treatment.
Spider mite control works better as a process:
1. Confirm the pest.
2. Isolate the affected plant.
3. Remove heavily damaged material where appropriate.
4. Wash the foliage thoroughly.
5. Apply a suitable treatment if necessary.
6. Repeat monitoring and treatment.
7. Correct environmental conditions that favor the mites.
Here are nine practical methods.
1. Isolate the Infested Plant
The first step after confirming spider mites is to separate the affected plant from other houseplants.
This matters because spider mites can spread to nearby plants, particularly when plants are touching or positioned close together.
Move the affected plant away from your collection and inspect neighboring plants carefully.
Do not assume that a plant is safe simply because you cannot see webbing. Spider mites can be difficult to detect when populations are still low.
Check nearby plants for:
• Pale stippling
• Yellowing leaves
• Fine webbing
• Tiny moving specks
• Damage concentrated on leaf undersides
American Horticultural Society (AHS) recommends isolating newly acquired indoor plants for a period of time as one way to reduce the chance of introducing pests to an existing collection.
2. Wash the Plant Thoroughly With Water
For a small or moderate infestation, washing can be one of the most useful first steps.
Take the plant to a suitable location such as a shower, bathtub, utility sink, or outdoor area when conditions allow.
Use a firm stream of water to rinse the foliage thoroughly.
Pay particular attention to the undersides of leaves, because spider mites commonly feed there.
The goal is to physically dislodge mites and reduce the population before considering additional treatments.
Iowa State University Extension specifically recommends washing or syringing infested foliage with a forceful spray of water.
For small plants, you can support individual leaves while rinsing them. For larger plants, work systematically from the upper foliage downward.
Do not use a water stream so strong that it tears leaves, breaks stems, or damages delicate growth.
Why washing helps
Spider mites are small enough to be physically removed by a thorough rinse.
Washing also removes dust and debris from foliage, making it easier to inspect the plant afterward.
However, washing should not be treated as a one-time miracle cure.
Eggs and mites that escape the initial treatment can allow the infestation to return, so continued monitoring is important.
3. Remove Severely Infested Leaves
If individual leaves are heavily damaged, badly yellowed, or covered with substantial webbing, removing them can reduce the number of mites on the plant.
Use clean, sharp pruning scissors and remove only foliage that genuinely needs to go.
Do not strip a healthy plant of most of its leaves simply because you see some mites damage.
Leaves that are still functioning can continue contributing energy to the plant’s recovery.
If you remove infested material, place it directly into a bag and dispose of it rather than leaving it beside other plants.
Also clean your hands and tools after working with an infested plant. University of Minnesota Extension recommends washing hands and tools after working with infested plants to reduce accidental spread.
4. Use Insecticidal Soap
If washing alone does not bring the infestation under control, an insecticidal soap labeled for use against mites can be considered.
Insecticidal soaps are specially formulated pesticide products. They are not the same thing as ordinary household dishwashing detergent.
This distinction is important.
Some homemade soap mixtures can injure plant foliage, particularly on sensitive plants or when used at inappropriate concentrations.
Colorado State University Extension notes that insecticidal soaps can control spider mites but must come into direct contact with the pest and can potentially damage some plants.
When using an insecticidal soap:
• Read the entire product label.
• Confirm that it is labeled for your intended use.
• Follow the specified dilution.
• Pay particular attention to leaf undersides.
• Test a small area first if the label permits.
• Avoid spraying stressed plants unless the label specifically supports that use.
• Follow all precautions concerning people, pets, ventilation, and edible plants.
Do not assume that using more product will produce better results.
The label is the correct authority for application instructions.
5. Consider Horticultural Oil
Horticultural oils are another option for controlling spider mites.
They can be effective when applied correctly and when the product is specifically labeled for the intended plant and pest.
University extension sources identify horticultural oils among the commonly used treatments for spider mites.
Coverage is particularly important because spider mites often remain on the undersides of leaves.
However, horticultural oil is not suitable for every plant in every situation.
Some foliage can be sensitive to oil applications, and improper use can cause leaf injury.
Before applying an oil product:
• Read the label completely.
• Check whether your plant is listed or otherwise covered.
• Follow the recommended concentration.
• Avoid applying under conditions that the label identifies as unsafe.
• Test a small section when appropriate.
• Keep treated foliage away from excessive heat or other conditions specified on the label.
One extension source specifically warns that some plants with hairy or bluish foliage can be sensitive to oil applications.
6. Be Careful With Neem Oil and Homemade Remedies
Neem oil is frequently recommended online for spider mites, but it should not be treated as a universal solution.
If you decide to use a neem-based product, choose one that is properly labeled for the intended use and follow its instructions.
The same principle applies to homemade remedies.
Avoid assuming that a kitchen mixture is automatically safer because it is natural or inexpensive.
Household detergents, concentrated soaps, vinegar mixtures, alcohol mixtures, essential oils, and other improvised sprays can cause phytotoxicity or other problems if used incorrectly.
The North Carolina State Extension specifically advises against using household liquid soaps or cleaning products as pesticide substitutes.
The safest principle is simple:
Use a product formulated and labeled for plants rather than experimenting with concentrated household chemicals.
7. Improve the Plant’s Growing Conditions
Spider mites tend to perform particularly well under warm, dry conditions.
That does not mean you should place every plant in an extremely humid room.
Instead, focus on creating conditions appropriate for the particular plant while avoiding unnecessary dryness and stress.
University extension sources identify warm, dry conditions as favorable to spider mite problems and note that increasing humidity can slow their population growth.
Depending on the plant, useful steps may include:
• Keeping the plant properly watered
• Avoiding prolonged drought stress
• Improving air circulation
• Avoiding excessive heat
• Maintaining suitable humidity
• Providing appropriate light
• Keeping foliage reasonably clean
Remember that humidity is not a replacement for treatment.
Increasing humidity may make conditions less favorable for spider mites, but it does not mean that a humidifier alone will eliminate an established infestation.
8. Keep Monitoring and Repeat Treatment
This is one of the most important parts of spider mite control.
A single treatment may dramatically reduce the visible population without eliminating every mite or egg.
Spider mites can have a relatively short life cycle under favorable conditions. Colorado State University Extension notes that their life cycle can be completed in roughly one to two weeks under favorable conditions.
That is why follow-up matters.
Inspect the plant regularly after treatment.
Check:
• New leaves
• Leaf undersides
• Areas around leaf joints
• Growing tips
• Previously damaged foliage
• Nearby plants
If you are using an insecticidal soap, horticultural oil, or another pesticide, repeat applications only according to the product label.
Do not create your own treatment schedule by guessing at concentrations or application intervals.
Different products have different directions.
9. Discard Extremely Infested Plants When Necessary
Sometimes the most practical solution is to remove a plant that is severely infested and unlikely to recover economically or aesthetically.
This can be especially reasonable when:
• The plant is inexpensive and readily replaceable.
• The infestation is severe.
• Multiple plants are becoming infected.
• Repeated treatment has failed.
• The plant has lost most of its functional foliage.
Iowa State University Extension and other university sources acknowledge that heavily infested houseplants may sometimes be better discarded to prevent continued spread.
This is not a failure.
Protecting an entire plant collection can be more important than saving one severely damaged plant.
How to Treat Spider Mites Naturally
Many plant owners search specifically for how to get rid of spider mites naturally.
The most straightforward low-chemical approach is physical removal.
Start by isolating the plant and thoroughly washing the foliage with water.
Remove badly infested leaves when appropriate, improve growing conditions, and continue inspecting the plant.
For a small infestation, these measures may substantially reduce the population.
However, “natural” does not necessarily mean “risk-free.”
A homemade spray can still burn leaves.
A natural oil can still cause phytotoxicity.
And a treatment can still fail if it does not reach the mites.
The goal should therefore be effective and responsible pest management, not simply choosing something because it is labeled natural.
Does Increasing Humidity Kill Spider Mites?
No.
Increasing humidity may make conditions less favorable for spider mites, but it should not be considered a standalone cure.
Spider mites generally prefer warm, dry conditions, and higher humidity can slow their population growth in some circumstances.
If you have an established infestation, continue with physical removal and appropriate treatment.
Also remember that different houseplants have different humidity requirements.
Do not create excessively wet or stagnant conditions simply because you are trying to discourage mites.
Your goal is to maintain an environment suitable for the plant while reducing conditions that encourage pest outbreaks.
How Long Does It Take to Get Rid of Spider Mites?
There is no universal number of days because the answer depends on the plant, severity of the infestation, environmental conditions, and treatment method.
A small infestation may become manageable relatively quickly after thorough washing and follow-up.
A severe infestation can require repeated treatment and monitoring over several weeks.
This is one reason it is better to think of spider mite control as a management process rather than a single application.
If the population continues increasing despite appropriate treatment, reassess the diagnosis and check whether nearby plants are also infested.
Common Mistakes That Make Spider Mite Problems Worse
Spider mite problems can worsen when common treatment mistakes are repeated. Avoid these errors to protect your plants, control infestations, and prevent the pests from spreading.
1. Treating Only the Top of the Leaves
Spider mites frequently feed on the undersides of leaves.
If you spray or wash only the upper surfaces, you may leave a substantial portion of the population untouched.
Always inspect the underside of foliage.
2. Treating Once and Stopping
Seeing fewer mites after one treatment does not necessarily mean the infestation is gone.
Continue monitoring the plant and follow the product’s directions for repeat applications when applicable.
3. Using Dish Soap as Insecticidal Soap
These products are not interchangeable.
A product designed specifically as an insecticidal soap has a formulation intended for pest control on plants.
Household cleaning products can injure foliage.
4. Ignoring Nearby Plants
An infested plant sitting among healthy plants is a continuing source of risk.
Inspect the surrounding collection and isolate affected plants.
5. Overwatering the Plant
Trying to fight spider mites by keeping the soil constantly wet is a mistake.
Spider mites and watering problems are separate issues.
Maintain the plant’s appropriate watering routine rather than saturating the soil unnecessarily.
For practical watering tips, explore our Complete Beginner’s Guide on How to Water Indoor Plants Properly, covering when to water, how much to use, and common watering mistakes to avoid.
6. Increasing Humidity Without Improving Air Movement
Humidity can be useful for some plants, but excessive moisture combined with poor air circulation can create other plant-care problems.
Think about the entire growing environment rather than treating humidity as a magic solution.
7. Using Too Much Pesticide
More product does not automatically mean better control.
Incorrect concentrations can damage leaves and may create unnecessary exposure.
Follow the label.
Spider Mites vs Other Common Houseplant Pests
Not every tiny pest on a houseplant is a spider mite.
1. Spider mites
Common clues include:
• Fine stippling
• Tiny moving specks
• Fine webbing in heavier infestations
• Damage concentrated on foliage
• Yellowing or bronzing as damage progresses
2. Aphids
Aphids are generally larger and easier to see than spider mites. They often cluster around young growth and can produce sticky honeydew.
3. Mealybugs
Mealybugs commonly appear as white, cottony or waxy clusters around stems, leaf joints, and other protected areas.
4. Fungus gnats
Fungus gnats are small flying insects commonly associated with moist potting media. Their adults are usually seen around the soil rather than crawling across leaf undersides.
Correct identification matters because different pests require different management strategies.
Learn how to identify and manage common infestations with our guide to 8 Common Indoor Plant Pests and How to Eliminate Them, including practical prevention and control tips.
How to Prevent Spider Mites on Indoor Plants
Prevention begins with observation.
You do not need to inspect every plant with a microscope every morning. A simple routine can make a significant difference.
1. Inspect New Plants
Before adding a newly purchased plant to your collection, inspect its leaves, stems, and growing points.
Look underneath the leaves.
If practical, keep new plants separated from the rest of your collection for a period of observation. Missouri Botanical Garden recommends isolating newly acquired indoor plants for two to three weeks to help limit pest introductions.
2. Check Plants Regularly
Look for unusual stippling, yellowing, webbing, or declining vigor.
Early detection generally makes pest management easier.
3. Keep Foliage Clean
Dusty foliage can make it harder to spot developing pest problems.
Occasionally cleaning suitable houseplant leaves can also make inspection easier.
4. Avoid Chronic Plant Stress
Healthy plants are not immune to spider mites, but maintaining suitable light, watering, temperature, nutrition, and humidity helps plants tolerate problems better.
Avoid repeatedly allowing plants to become severely drought-stressed.
5. Give Plants Enough Space
Crowded plants can make inspection and treatment more difficult.
Adequate spacing also makes it easier to identify which plants are affected.
6. Inspect the Undersides of Leaves
This is one of the simplest habits you can develop.
Do not inspect only the attractive upper surface of your houseplants.
Turn the leaves over.
That is where you may discover a problem before it becomes obvious from across the room.
A Simple Spider Mite Treatment Plan
If you have just discovered spider mites on an indoor plant, do not panic. Early action can help reduce the infestation before it spreads to other plants.
Follow this simple step-by-step treatment plan to get started:
1. Confirm the Problem
Look closely for common signs of spider mites, including fine stippling, pale or yellowing leaves, delicate webbing, and tiny moving specks. If the mites are difficult to see, gently tap a suspicious leaf over a white sheet of paper and use a hand lens to check for movement.
2. Isolate the Plant
Move the affected plant away from your other houseplants to reduce the risk of the infestation spreading. While doing this, inspect nearby plants carefully, paying particular attention to the undersides of their leaves.
3. Wash the Foliage
Thoroughly rinse the plant with a steady stream of water strong enough to dislodge mites without damaging the foliage. Concentrate on the undersides of the leaves, stems, and other areas where mites may be present. Washing can physically remove a significant number of mites from the plant.
4. Remove Severely Damaged Foliage
If some leaves are heavily infested, badly damaged, or unlikely to recover, remove them with clean, sharp pruning scissors. Avoid removing healthy foliage unnecessarily, since the remaining leaves are important for the plant’s recovery.
5. Continue to Monitor and Repeat as Needed
Do not assume the infestation is gone after one treatment. Check the plant regularly for returning mites, fresh stippling, or new webbing. If you use an insecticidal soap, horticultural oil, or another treatment, follow the product label carefully for application and repeat-treatment instructions.
Frequently Asked Questions About Spider Mites on Indoor Plants
1. What is the fastest way to get rid of spider mites on indoor plants?
A thorough wash can quickly reduce the number of spider mites on a plant. Isolate the plant, rinse the foliage carefully, especially the leaf undersides, and continue monitoring. Larger infestations may require repeated treatment with a product labeled for spider mites.
2. Can spider mites kill indoor plants?
Yes. Severe spider mite feeding can cause extensive leaf damage, reduced growth, leaf drop, and potentially plant death.
3. How do I know if my plant has spider mites?
Look for fine pale stippling, yellowing or bronzing leaves, tiny moving specks, and fine webbing. Tapping suspicious foliage over white paper can help reveal mites that are otherwise difficult to see.
4. Can I wash spider mites off my houseplants?
Yes. A thorough spray of water can physically dislodge mites from foliage. Washing is particularly useful for small infestations and should focus on the undersides of leaves.
5. Does neem oil get rid of spider mites?
Neem-based products may be used for pest management when the specific product is labeled for the intended use. Follow the product label carefully rather than assuming that any neem oil formulation is appropriate for every houseplant.
6. Does dish soap kill spider mites?
Do not assume ordinary dishwashing detergent is equivalent to insecticidal soap. Household cleaning products can damage plant foliage. Use a properly formulated insecticidal soap according to its label instead.
7. Do spider mites live in potting soil?
The primary problem with spider mites is usually on the plant’s above-ground foliage rather than the potting soil. Focus your inspection on leaves, stems, and growing points.
8. Can spider mites spread to other indoor plants?
Yes. An infested plant can act as a source of mites for nearby plants. This is why isolating affected plants and inspecting neighboring plants are important parts of management.
9. Will higher humidity get rid of spider mites?
Higher humidity may make conditions less favorable for spider mites, but it does not reliably eliminate an established infestation. Treatment and continued monitoring are still necessary.
10. How often should I treat spider mites?
There is no single schedule that applies to every product. Follow the label for the insecticidal soap, horticultural oil, or other pesticide you are using. Multiple applications may be necessary because spider mite populations can develop quickly.
11. Should I throw away a plant with spider mites?
Not necessarily. Plants with manageable infestations can often be treated. However, discarding a severely infested plant may sometimes be the most practical way to protect nearby plants, especially when repeated treatment is unsuccessful.
Conclusion
Learning how to get rid of spider mites on indoor plants is less about finding one magical spray and more about responding quickly and consistently.
Start by confirming the problem. Isolate the affected plant, inspect nearby plants, and thoroughly wash the foliage. Remove severely damaged leaves when appropriate, then consider an insecticidal soap or horticultural oil that is properly labeled for the plant and pest. For additional guidance on identifying and managing common plant pests, the Royal Horticultural Society (RHS) provides reliable horticultural information.
Most importantly, do not stop paying attention after the first treatment.
Spider mites are tiny, and an infestation that looks controlled today can become noticeable again if surviving mites reproduce. Regular inspection, appropriate plant care, and timely intervention are your best long-term defenses.
If you catch the problem early, there is a much better chance of reducing the infestation before extensive damage occurs. The Missouri Botanical Garden also provides useful plant-care and pest-management resources for gardeners.
Healthy indoor plants are not maintained by never having problems—they are maintained by noticing problems early and responding to them correctly.
For more help diagnosing common issues, see our guide to 21 Common Indoor Plant Problems and How to Fix Them Fast, with practical solutions for yellow leaves, pests, wilting, and more today.

I’m Bon (aka Guider), a dedicated indoor gardening writer and houseplant specialist with years of hands-on experience cultivating diverse indoor flora. I author comprehensive, data-backed guides designed to help beginners master indoor plant care, including advanced soil science, precise watering schedules, lighting optimization, and pest troubleshooting. To ensure the highest level of accuracy and editorial integrity, every article integrates practical horticulture principles with peer-reviewed research from university extension services, botanical institutions, and trusted horticultural organizations.
Hi Bon,
I actually followed the steps in this guide after noticing tiny webs and speckled leaves on one of my indoor plants. I isolated the plant, washed the leaves thoroughly, removed the badly damaged foliage, and kept checking it over the next few days. I also treated it as recommended instead of stopping after the first wash.
The spider mites are now gone, and the plant is already starting to look healthier. The step-by-step approach made it much easier to know exactly what to do. Thanks, Bon!
Hi ARCD, it is a pleasure having you stop by my new site with a testimony, thanks bro., keep visiting, and keep sharing my contents.